Thursday, December 31, 2009
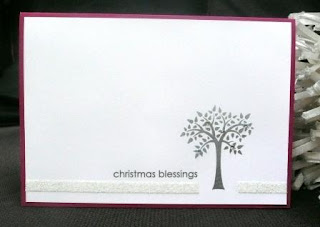
Happy new year
I hope you all had an exciting and safe new year and enjoyed welcoming in 2010.
I can not believe how quickly last year just flew by, but I am very thankful for all the wonderful things that happened to me, including meeting so many lovely people through my classes and through this blog. Let's hope this year is fantastic for us all.
Cardstock: Basic black, whisper white, silver
Paper: Urban Oasis
Stamps: Cheers to you, Starring You
Inks: Staz on black, pretty in pink
Other: Pretty in Pink marker, dazzling diamonds glitter, Blender Pens
Tools: Word window punch, circle scissors, Horizontal slot punch
Wednesday, December 23, 2009
Merry Christmas to all
A little story...
My six year old son, Timmy approached me last week and very humbly asked me, with very sad eyes why I made cards for everyone, except him. Boy did that make me feel bad, mostly because he is right, I have made cards almost every day of his life, and he sees thousands go through this house, but I don't make them for my own kids. This year he has has been so excited over every card we have received (and he keeps count), every decoration and tiny bit of tinsel. He just loves Christmas and goes out every night to longingly stare at the next door neighbour's xmas lights. So I decided to make a card just for him last night. I have seen on many blogs covered chocolate bars with this reindeer face, so I thought I could make it into a card instead. I was really happy with it, and thought he would like it, so this morning I presented it to him, and do you know what he said....the reindeers antlers were not big enough......some people are just never happy!
I would like to take this opportunity to wish you all a very happy, safe and merry christmas and a fantastic new year. Take time out with your families and don't forget to spoil them with your love and attention, they will notice and appreciate it, even if they don't say anything about it. Cheers to you all.
Love Michelle
Cardstock: Textured choc chip, close to cocoa, real red, whisper white, basic black
Ink: choc chip
Punches: Scallop for hair, 3/4" for eyes, 1 3/4" and 1 1/4" for nose
Ribbon: Polka dot real red (from summer mini)
Other: white gel pen, chit chat rub ons, chipboard scroll (not SU), sponges, dazzling diamonds glitter
Tuesday, December 22, 2009
Free shipping
Yep, that's right. I would like to offer you all free shipping on all orders over $50 placed before 31st Dec 2009. That's a minimum saving of $5.95, for your order to be delivered to your door.
There are some great specials on, so be sure to check them out, and maybe spoil yourself a little....
A birthday card at Xmas
I had to make a male birthday card this week, and I must say it was so hard when all my focus at the moment is on christmas. But, this is what I came up with. I used textured choc chip cardstock for the primary part of the card because I felt it needed the extra detail, a chit chat rub on, some punches and ribbon. When I am not feeling particularly creative I always limit myself to two colours to make the process easier. Try it!
Cardstock: Textured choc chip, close to cocoa, whisper white, silver
Ribbon: Wide choc chip grosgrain
Rub ons: Chit chat, retired rub ons from last years summer mini (sorry forgot the name)
Other: silver eyelet
Tools: 1 3/8" circle, small star, 1 1/4" circle, corner rounder, matt pack
Tuesday, December 15, 2009
Some stamp sets 50% off!
Stampin' up is having its first ever inventory sale. You'll get amazing discounts on selected stamp sets, check out the list here.
Please note that all the stamps on the list are not pre cut, as they are with the newer stamps.
Please email me if you would like to order a set, the discount applies only while stock last.
Please note that all the stamps on the list are not pre cut, as they are with the newer stamps.
Please email me if you would like to order a set, the discount applies only while stock last.
Saturday, December 12, 2009
A girly birthday card
It's my sister's birthday today, so I had to quickly whip her up a card this morning, ready to take over this afternoon. There's nothing like a bit of pressure to stimulate the creatice juices!
Anyway, she is very girly, so I used pretty in pink and lots of flowers and glitter to create this, and my latest toy, Circle Scissors.
The rub on is from the Chit Chat pack available in the summer mini. Have I told you I love these!
The chipboard Lots of letters I have covered in white ink, then dipped in heat and stick powder then dazzling diamonds. This glitter is the finest most sparkly glitter I have used, and believe you me I have used tons. It works so well with heat and stick powder, where the coarser glitters really don't give the same effect at all and tend to give a bit of a patchy effect. It's definitely one item thats well worth the money, and one pot does last for ages (that's if you don't spill it). All materials except the pink gemstones are from Stampin' Up!
Papers: Tea Party
Cardstock: Pretty in Pink, whisper white
Chipboard: Lots of letter
Rubons: Chit Chat
Flowers and Pearls: Pretties Kit
Other: Heat and stick powder, dazzling diamonds, gemstones, white grosgrain
Tools: Circle Scissors, heat gun, mat pack
Tuesday, December 8, 2009
Some gifts
I was lucky enough to receive some handmade gifts this week, that I thought I would share with you. The first gift is a christmas decoration using the new sweet treat cups, and ribbon from the mini. I was blown away with firstly how effective this looked and secondly how easy these would be to make. Looks like I will have to order even more of these cups!
The other gift I received was this beautiful desk set complete with calendar and pen. This was made from an acrylic photo frame used on its side, and the stamp set 'For Everything' and the Kaleidoscope papers available again in the new summer mini. I just cleaned up my desk last week - which I know is hard to believe, so I it's sitting proudly on it at the moment. Thanks Jo and Merryl for such lovely gifts.
Monday, December 7, 2009
Easy heart card
This was the other card we made at the class last Wednesday. It was really easy to make, we just used the heart punch twice on a small piece of white and stuck some ribbon scraps behind the heart shapes. We then added a chit chat rubon, some faux stitching, a scallop border, and some dry embossing (just to add some detail). The card of course was inspired from one in the new summer mini, now available. This card could be used for an engagement, wedding or valentine card depending on the greeting that was chosen.
Now I just have to try it some more colour combos....
Wednesday, December 2, 2009
Kaleidoscope Journal
I just love these new papers from the summer mini. Such pretty colours!
And perfect to cover this journal in. I have decided to make a few of these to give as gifts this christmas. I like it when a handmade gift can useful.
The flower is one I bought at a junk shop years ago. They were actual fake flowers (not in the craft section) and I just pulled them apart to make them flat. The centre is a large flat back pearl from the pretties kit surrounded by gemstones.
Monday, November 30, 2009
New class for Wednesday 2nd Dec at 10am
Boy was that one hot weekend! I hope you all survived, and have enjoyed the cooler weather today. I know I have.
Now onto Wednesday's class - In this class you will be creating cards that are a little bit different from the norm, as well as an easy bag in a box.
This card has a bead shaker box that won't take any time at all create.
And this is the easy bag in a box. So simple to make!
And this card has a jaffa wreath. And yes you can get the jaffas out to eat.
I am also going to include another card (that is not a xmas card) that is a case from the new summer mini which starts Dec 1. But you will have to trust me on this as I don't have one to show you yet.
Because this will be the last Wednesday class for the year, I hoping we have some time to have a christmas drink and some nibbles. All welcome. Class cost is $20 and includes all materials and tools, and a copy of the new summer mini (and the drinks of course). Please email me to reserve your spot.
Tuesday, November 24, 2009
Combining the old and the new
With December fast approaching, the current spring mini finishes in less than a week, and a new summer mini will be available. I thought for these cards I would use a few favourite products from each of them. The first card uses Parisian Breeze specialty paper, and if you are thinking its a bit expensive, its because it is not like other paper at all. It's so much thicker than usual cardstock which means its perfect for making the actual card base from or its great for boxes and 3D items. I also used one of my favourite stamp sets Gallery (Boy I'm going to miss this set) and a beautiful Corduroy Button. The matching satin ribbon is currently on the christmas extravaganza list, so its a great time to stock up on this. And the two items from the new mini - the crochet flower and the greeting rub on. I have a feeling you may see a lot of these!
I just had to use the beautiful oval scallop punch and matching stamps set for this one. These have both had an extensive work out from me - just love them.
If you would like to order any items from the mini you only have until Monday the 30th of November.
Thanks for stopping by.
Sunday, November 15, 2009
Handmade gifts class - Wed 18th Nov and Sat 5th Dec
It's that time of year when I rack my brain for ideas for small gifts to give to friends, teachers and family.
I have decided on a notepad set and wineglass charms in a folder. If you would like to make these and lets face it, it beats shopping, why not come along on any of the days listed above to complete yours. I will be using various coloured papers, so you don't neccasarily have to use those I have shown here.
This is the notepad set, it uses a brand new butterfly set and matching punch!
It includes a lined notepad, that can easily be replaced, a 2010 calendar and small unlined notepad. It would be great beside the phone.
And this is the wineglass charm folder. We will be using the fantastic build a brads, which really give some great dimension.
And these are the charms inside. I will have a variety of these for you to choose from and they will be included in the class fee.
The class will be offered on Wednesday the 18th Nov at 10am and Saturday the 5th Dec. (Sorry about the date change, Nov is just sooo busy for me)
The class cost is $20 and includes all materials and tools and a light morning tea. All welcome, but please email me to reserve your spot.
Friday, November 13, 2009
Forest Friends Cards
I made these Christmas cards with the tree stamp from Forest Friends - the set with the owl, deer and rabbit stamps from the current mini catalogue. I stamped the tree with silver ink for a bit of elegance and added some bling. The sentiments are new rubons from the summer mini starting 1 Dec.
I think this one is my favourite. It also uses the swirl from Season of Joy, stamped a few times. The card colours are basic grey, pale plum, whisper white and silver. Love those rubons!
I used the retired purely pomegranite for this card base, and lots of dazzling diamonds for some shine.
Tuesday, November 10, 2009
Snowglobe card
This is another card we made at the fundraiser, however it was made without the glitter addition. I think it looks fantastic with it, and its easy with heat and stick powder and some dazzling diamonds - so worth the effort. This card uses the stamp set Snow Swirled... its really get a work out around here this year!
Wednesday, November 4, 2009
I now have a website
Yes thats right, I now have a website you can go to check specials, events, and even join stampin up from. I'm still working at getting projects uploaded, and it may take me a while during this very busy season, but I'll get there eventually.
My website address is http//michellelebreton.stampinup.net
Oh and Stampin' Up have changed the current special - with every $85 you spend from the gift guide you can choose either the scallop square punch OR the boho blossom punch valued at $30.95 for FREE.
My website address is http//michellelebreton.stampinup.net
Oh and Stampin' Up have changed the current special - with every $85 you spend from the gift guide you can choose either the scallop square punch OR the boho blossom punch valued at $30.95 for FREE.
Brushed metallics
I love anything with a bit of shine, so it goes without saying that I love the Stampin' Up brushed metallic cardstock. I used the gold cardstock in the card above, along with the stamp sets, Great Friend, All Scallops, and Haiku designer paper and Tangerine Ribbon and a tiny bit of pumkin pie cardstock for warmth.
For this card I used the copper cardstock. I love, love this colour, and think it needs very little to look great, so I just used a piece of chipboard On Board So Tweet for embellishment with gemstone brads and the stamp from Its your Birthday. For the chipboard I covered it in Staz On ink then coated the piece with Crystal Effects to give it the glossy finish. If you are going to try this, make sure you allow lots of time for chipboard to dry, preferably overnight, so you don't damage it with your finger prints. I say this with experience on my side, as my impatience has ruined many a piece over the years!
Thanks for stopping by.
Friday, October 30, 2009
Xmas card class on Wed 4th and Sat 7th
I've just finished preparing for next weeks class, where I have created five very different Christmas cards so you can choose which four you would like to make. (Sorry to those that hate making decisions.) I have used alot of different tools and materials in this one, so it will be a great overview for you. The first card uses masks and heat and stick powder. I did this one so those of you who are unsure of how to add the glitter to your fundraiser cards will have no problem.
The second uses some chalks and an interesting way of adding ribbon to your projects.
This card uses some sponging to add colour to a stamp. Very easy!
This card uses some shadow stamping, but is still really quick and easy to make.
And lastly a quick card using some punches, eyelets and a crop-a-dile.
The cost of this class is $20 and includes all materials and tools, but I ask that you email me to reserve your spot. The class is offered on Wednesday the 4th at 10am and Saturday the 7th at 10.30am. All welcome.
More cards from the fundraiser.
Here are a few more cards the ladies got to make who attended the Girls Night In fundraiser on Saturday. You might recognise this one from a card I made a few months ago.
This card uses the beautiful Oval All Stamp set and co ordinating scalloped oval punch available in the mini at the moment. Sadly neither of these will be available after November 30.
This simple card uses Fifth Avenue Floral. I love using this stamp set. It always stamps so beautifully.
Tuesday, October 27, 2009
Some cards from the 'Girls Night In' fundraiser
Last Saturday night a few Stampin' Up! demonstrators and myself hosted a 'Girls Night In' fundraiser and we are pleased to announce that we manged to raise $2,035 from the event. This amount does not include the sale of the pens and badges, which would amount to another few hundred, as it was a very empty box of product at the end of the night. So thankyou to all who attended and helped to make the night lots of fun as well as raise money for this worthwhile cause.
Now here a few of the things the girls got to make. Seven cards and two tags were made by all. Some were very simple, while others included a few extra steps, but with all of them we included some ideas of how you could dress up the cards at home if you desired.
These tags were quick and simple, using the Winter Post stamp set, but you could use them in lots of ways. I made mine into xmas cards with a silver backing, clear embossed with Polka Dot and added some flowers, pearls and lots of glitter.
Oh, and I had to use one of the silver hodgep0dge frames, just love these!
Another card we made was this Inspired By Nature one using chalks and versa mark.
This card is easily dressed up with some glitter, a greeting and a flower.
I love the Circle Circus stamp set and this card uses it as a flower motif.
And it can easily be dressed up with a little bling.
(This is actually the card my mum made on the night.)
Thank you to everyone who came and helped to make the day a great success. I enjoyed seeing so many friendly faces, and was quite overwhelmed by the kind and caring nature of you all.
Subscribe to:
Posts (Atom)